
Learn to make your own Bonsai plate for your plant. Discover the power of your own creativity and create a nice plate or rock formation.
The world of the Bonsai is much bigger than just the Bonsai itself. Roots, rocks and mountains have a very close relationship with Bonsai. Nature is so beautiful that it is worth to reproduce it on a small scale. A forest is an impressive form of Bonsai. Let your imagination run free and hear the birds sing.


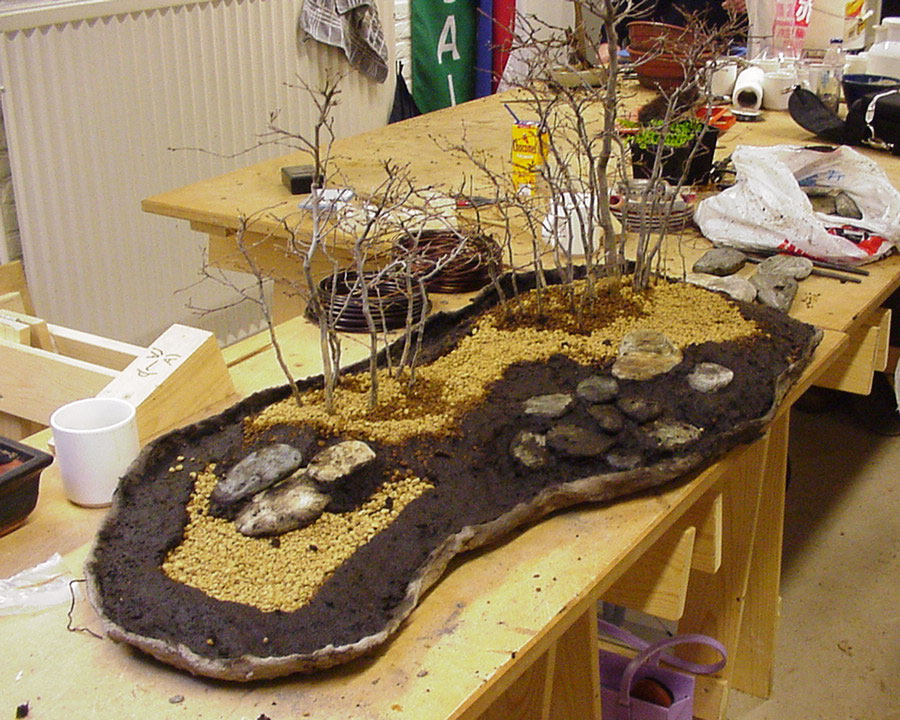
De The plates above (moon scale and landscape scale) were made in the studio of Mariline Limberti during one of her workshops.
Start with a simple plate. Later, when you have mastered the technique and when you know how to combine skills, knowledge and imagination, you can create the most beautiful plates or rock formations.
With the necessary materials below, you can also create a Chinese landscape (Penjing). Penjing landscapes are rock formations with Bonsai trees on top. These forms of miniature landscapes arise because people in China believe that the rocks are the housing of Immortal Souls. For Chinese, rocks are the same as sacred icons for the Greeks.
Tree species that are suitable for these type of projects are:
• Picea Abies “Little Gem”
• Cotoneaster microphyllus
• Juniperus procumbens nana
• Carpinus Turczaninowii
• Cryptomeria Yokohama
Materials needed to start:
• chicken wire with a not too wide mesh
• fiberglass cloth or fleece
• a large needle and a strong wire
• sharp scissors and a wire cutter
• pieces of wire to help strengthen the structure
• aluminum cement ‘fondue’
• old brushes
• silver sand or grit
• newspapers
• plastic bags
• buckets or containers for mixing the cement.
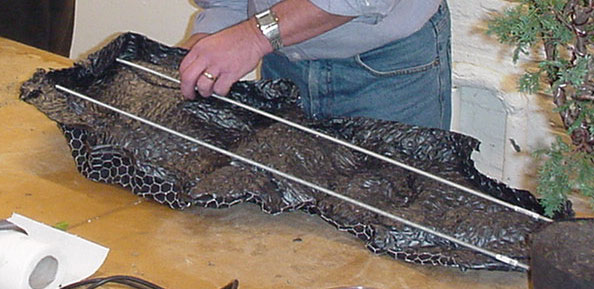
Start with an elongated piece of chicken wire. Do not use plastic coated wire, this is too stiff. Place the piece of wire on a loose piece of fiberglass cloth or fleece. Fiberglass cloth is used for covering garden crops in the field. It is a synthetic product.

Use the needle and thread to connect the fabric to the chicken wire. Do this accurately, if the fabric is not strongly enough connected to the wire mesh, it is likely that it jumps loose when the wire is shaped. In this case the cement will not hold properly and will crumble.
It comes down to the fact that the wire has to go through every hole in the wire. Stapling seems like a good option, but only on the straight pieces. At places where the wire bends, the staples will break.
In case you have already chosen the tree or trees for your plate, you can already shape the plate to your own idea. Rocks and landscapes are rough and crude, so do not make the shapes too rigid and certainly not too round. If you want a really high rock formation, add a piece of waterproof plywood of at least 8 millimeters at the bottom. Saw an oval shape of the plywood and attach the rock with staples. Again, you strengthen the base with a piece of thick wire.
As you can see in the image below you can reinforce the plate on the inside with a metal rod or a thick piece of wire.
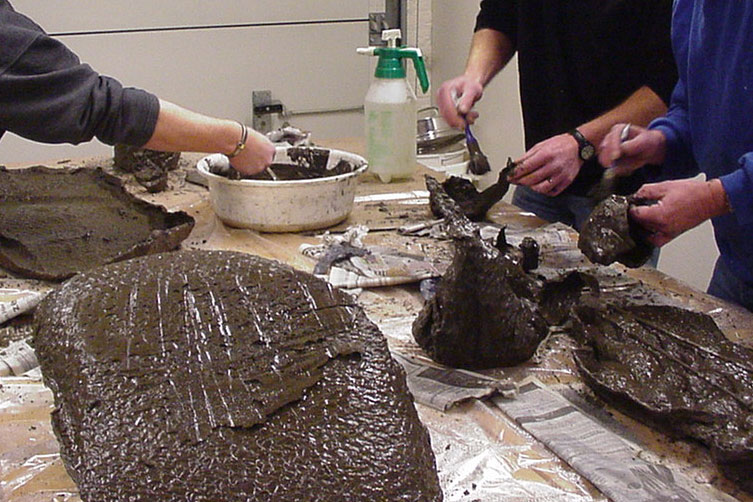
Once you have finished sewing and shaping your plate, you can prepare the cement or aluminous ‘fondue’.
It is important to keep the following in mind:
1. Cement hardens in the water, so be careful with cement in the sink
2. The cement must harden wet!

Grease the plate.
To create a rougher look on the surface, you can add cement or sand. The ratio is 3/1 sand 2/3 fondue. Carefully add water while stirring. The mixture must not be too thin, because then it will not dry well. It must have the same thickness of yogurt.
After this, cover the cement with a plastic layer. Make sure that the plastic does not touch the rock or plate, otherwise you will get a piece of smooth surface on that spot.

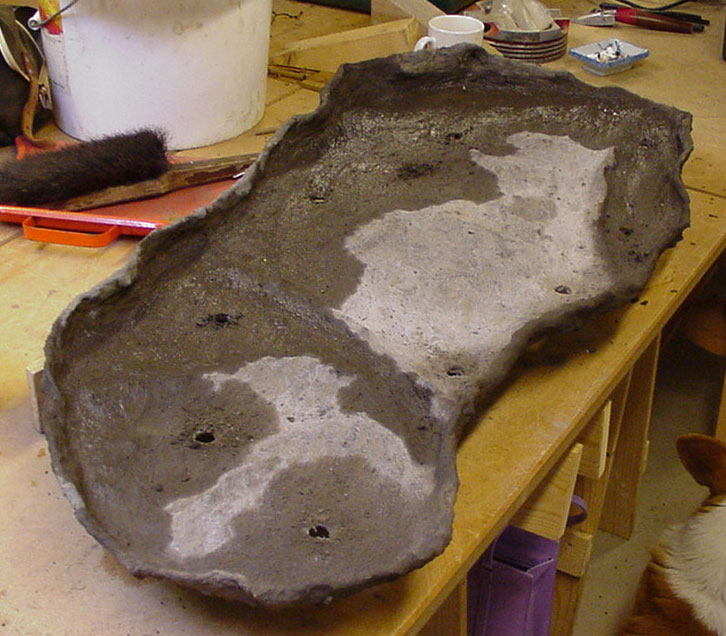
The plate or rock must cure for at least 24 hours. Spray the plate or rock regularly with water to slow down the drying process. It is best to place the plate or stone on a dry and unheated place, for example in the garage.
After 24 hours the second layer will be added. First, slightly dampen the plate or rock. After adding the second layer, let it dry again for 24 hours. You can choose to even add a third layer or just a third layer on the spots of the plate or stone that are still too thin to your liking. By adding color powder to the cement, you can change the gray color of the cement a bit. It is difficult to say which color and how much of the powder needs to be added. It is best to make a few tests to find out which shade you like best.

Once the plate has dried up it will be watertight.
TIP: This way you can also create a small pond in your creation.
Earth
• Keto / Japanese earth
• Akadama / Japanese loam soil
• Moss species, preferably like the one between paving stones, this is quite good moss.
• Your choice of pine / conifer (s)
• Bottom nets
• Discussion
• Additional stones or accent plants
Before planting, mix the Keto and Akadama: 1 part Keto on 3 parts Akadama. Carefully add some water to create a firm paste, again similar to the thickness of yogurt.
Make a number of holes in the bottom of your plate beforehand, excess rainwater can escape through here after planting. If you want to add a pond to your plate, do not make these holes where the pond will be.
With a stone you do not have to make holes. However, you can attach threads to the spots where you can attach the Bonsai tree (s).
After that, make a border of the Keto / Akadama mixture to keep the loose Akadama in its place. The advantage of Keto mixture is that it is very fertile clay, moss grows easily on it and it keeps the water well.
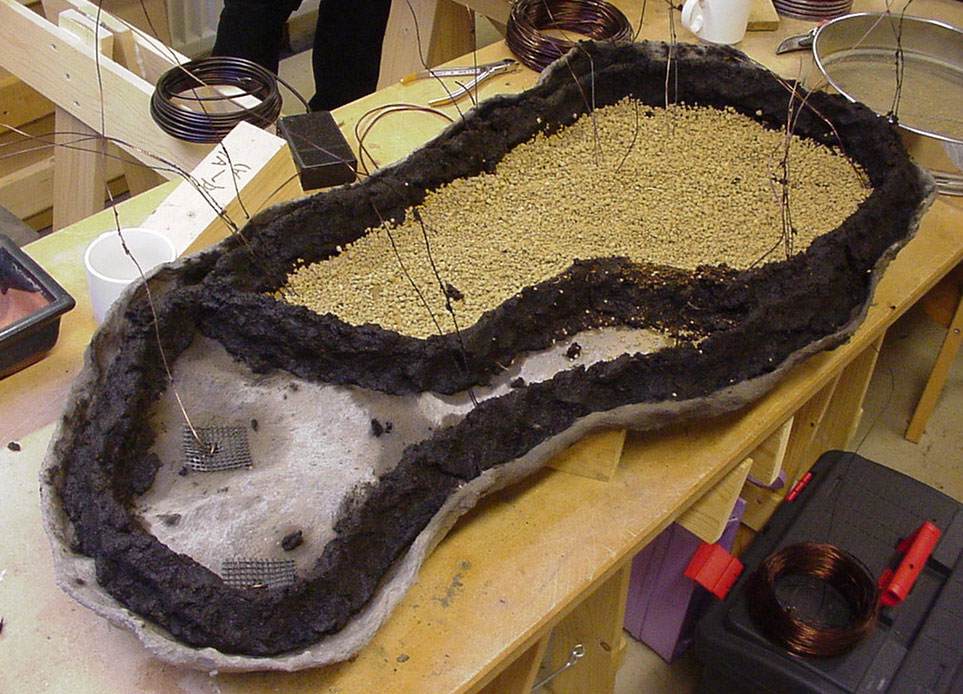
The next step is to add the trees. For this photo series an existing forest of hornbeams were chosen. These hornbeams were made of special plastic during a plate-training. This variant is the small-leaved Korean hornbeam / Carpinus Turczaninowii. A nice side-effect of this type of tree is that they turn very nice orange-red in autumn and have leaves a few months later. For these types of projects choose types with fine foliage, this enhances the feeling of space.
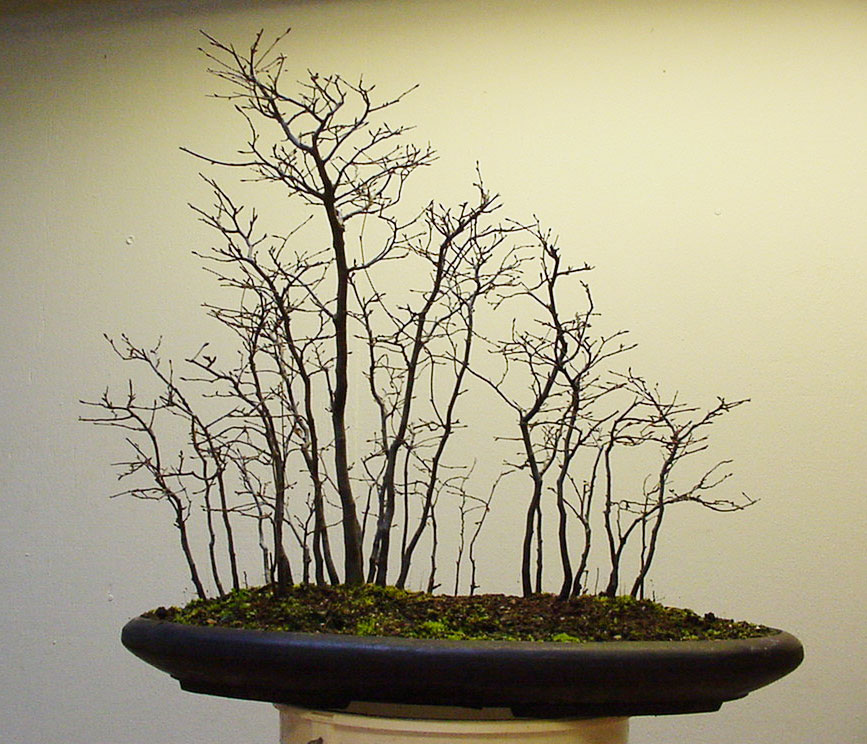

If the plate is very shallow, the landscape must be watered regularly. As you can see from the picture above, the Keto always dries a bit and will show some cracks on the outside. This is not a problem at all. It is up to your own creativity what you will add as accent plants. At the bottom of the rock you can always split them a bit, this will give the idea of a riverbed.

Have fun with your own creative artwork!
Laat een reactie achter
Je moet ingelogd zijn op om een reactie te plaatsen.